Kathy has very cleverly "tied" balloons to each letter of the large sentiment she placed at the bottom of her card, using a black pen. She also added some light grey shadows to the sentiment and balloons from the new Bountiful Balloons set to give them a 3D effect.
Friday, April 19
Wednesday, April 17
Monday, April 15
Saturday, April 13
Tutorial - Quad Twisted Easel Card
I have a fun card to share with you today, which is actually five cards in one. Although I've just used the little easel cards as decoration, they are definitely suitable for messages, images or sentiments if you wish.
1. You'll need a 12" x 6" piece of cardstock for your base; four 51/2" x 23/4" pieces of cardstock; four 23/4" x 23/4" pieces of cardstock; and embellishments, including four dimensional items to act as anchors (I'm using sentiments popped up with foam tape).
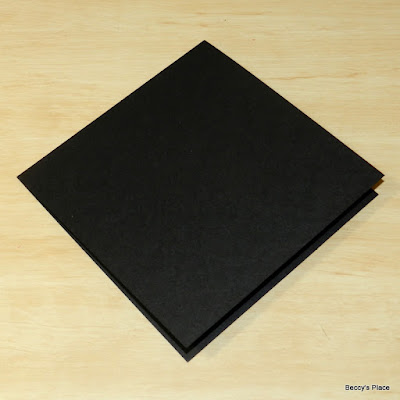
2. Score and fold the 12" x 6" piece of cardstock in half to form a 6" x 6" card base. Set aside.
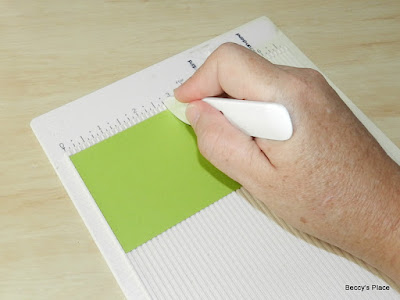
3. Place one of the 51/2" x 23/4" pieces of cardstock horizontally on your scoreboard, and score at 23/4".
4. Score from the top of the centre score line to the bottom right hand corner of the cardstock. The line should be a 45 degree angle. You can use a scoreboard insert to make it easier, or simply fold the right-hand side of the cardstock in half on an angle. See the template below for correct placement.
5. Fold along the score lines to form the easel card base. Repeat steps 3 - 5 for each of the other 51/2" x 23/4" pieces of cardstock to create your four easel cards.
6. Place one of the easel cards on the desk in front of you with the fold at the top and the opening directly in front of you. We're going to secure each of the 23/4" x 23/4" pieces of cardstock to the left hand triangle on each easel card.
7. Apply glue to the triangle section of the left-hand side of the card (see the photo below). Place the square of cardstock over the glue to secure in place and form the easel.
8. Repeat with the other three easel cards.
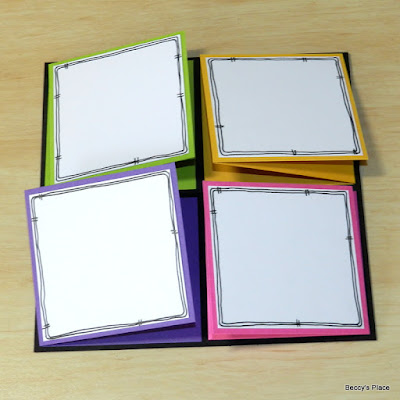
9. Before securing the easels to your card base, do a "dry run" to figure out the correct placement. There are a couple of ways to add your easels - in a pinwheel, which is what I've chosen, or all facing the same direction. If you want your easels to face the same direction, simply secure them to the 6" x 6" base in the same orientation.
10. To form the pinwheel, the easels need to be rotated a quarter turn each time. However, you must place them correctly so that they are able to fully open and not get in the way of the easels either side.
Open each easel. You'll see that the diagonal score line starts on the centre fold. Place this section of the easel in the corner of your card base. (For example, I'm placing the purple easel at the bottom left corner of my card base. I'll rotate the pink easel a quarter turn so that the diagonal score line is next to the bottom right corner of my card base. I'll rotate the yellow easel a quarter turn so that the diagonal score line is next to the top right corner of my case base, and then rotate the green easel so that the diagonal score line is next to the top left corner of my card base.)
11. Apply glue to the back of each easel and secure to the card base.
12. Time to decorate! I've added white cardstock with hand drawn borders and individual balloons, coloured to match the cardstock. Remember to match the decorations to the orientation of each easel.
13. The final step is to add our anchors. These are dimensional elements that hold the easel cards open. You don't want them to be too thick, as they are placed on the inside of each card, but you do want them substantial enough to hold the card open. I've used sentiments from the same digital set, printed, mounted on cardstock and applied with a little foam tape.
Digital Stamps:
Thursday, April 11
Cosmos Cards
One of the best things about the large Cosmos clear stamp is that it can be used in any orientation - side ways, upside down, right way up, even stamped back-to-back. It's very versatile and great for a wide variety of techniques.
Stamps:
Tuesday, April 9
Slider Card
I created this fun slider card with one of the goats from the Goat Club set of digital stamps. He's attached to a long piece of cardstock that, when pulled, reveals a hidden sentiment!
Products:
Monday, April 8
Birthday Balloons
Judy has created these two fabulous cards using the no-line colouring technique, which gives a hand-painted look. She then fussy cut the balloons from the Bountiful Balloons set and teamed them with sentiments for two awesome birthday greeting cards.
Did you know that Judy sells her beautiful hand made cards on Etsy?
Labels:
balloons,
Bountiful Balloons,
design team cards,
Judy VanZandt
Sunday, April 7
Black, White & Red
Today I want to show you how I colour black and white objects... and we'll throw in a little bit of red to keep things interesting. When colouring a black or a white object, the challenge is to get the right amount of shading and highlighting to create shape, without colouring the item grey.
Let's begin with the red. I usually apply a layer of the lightest colour to the entire image, keeping my pen strokes in the same direction / orientation as the image. For example, since I want a round balloon, my strokes are circular, following the outline of the balloon.
I like to add the darkest colour next and work my way back to the lightest, it seems easier to blend and to get the proportions correct. Keep the darkest shade to the lower portion of the balloon, and don't forget to add a little to the knot at the bottom.
Apply the next colour over the top of the darkest colour, blending them together where they meet. Take this second darkest colour a little further up the sides of the balloon, which will help to "shape" the image, giving it a spherical appearance. (Remember, dark colours recede and light colours come forward, so adding dark colours to the edges will "bend" the sides away creating the illusion of roundness).
Continue blending with the next colours, working further up the sides but keeping a circular shape in the centre, which is where our highlight will sit.
Finish your balloon by blending the lightest colour - the marker we began with - into the highlight area. You can use this same process for any colour you like, not just red. The basic technique is the same whether it's blue, yellow, purple, or red.
Now let's work on a black balloon. You'll want at least three shades of grey including a solid black, but you'll get a better result if you use five or six, depending on how large your image is. I'm using copic markers in 110, C8, C7, C6, and C5.
Start by applying a layer of your lightest colour in the same way as we did with the red balloon. Remember to follow the curve of the balloon.
Time to switch to the darkest colour. You might notice that I've used a lot more of the black than I did with the darkest red in this step. This is to ensure my balloon looks black rather than grey once I've finished. Generally, you'll want to fill more of the balloon with the darker colours while working up toward the highlight.
Blend in the next darkest colour, keeping that circular shape as you work. (I often skip the C9 as I don't find a lot of difference between it and the solid black.)
Blend the highlight with your lightest grey, the same one you began with.
Choose your markers for the white balloon. I'm using 0, C0, C1, C2, and C3.
Unlike the previous two balloons, we aren't starting with a base layer since our paper is already white. Instead, add your darkest grey to the bottom of the balloon, keeping the shadow very small. The challenge here is to bring our shadows gradually down to the white paper, leaving enough area uncoloured to form a highlight and to present the balloon as being white.
Blend your next marker into the first. As you can see, I still haven't coloured a very large area.
Continue with the mid-tone marker, bringing the ink up the sides of the balloon to meet at the top. Notice how I still have a very large circle of blank white card in the centre of the balloon.
Continue blending with the lightest grey, keeping the white area quite large.
Now work the edges of the grey with the 0 blending marker. This will help to break up the pigment and blend the grey into the white area.
Here's the completed image:
Digital Stamps:
Subscribe to:
Posts (Atom)


